How to run Nevitium from a flash drive
It is easy to run Nevitium Invoice Manager on a portable flash drive. If setup properly you can insert the flash drive into any Windows 2000 or XP computer and have access to your vital business data. This might be possible in other operating systems like Linux or Mac OS X but I don't have instructions for those. The Nevitium Settings on those systems will be similar to those shown.
First you need a clean, high-quality, modern (USB 2.0) flash drive. Insert it into your PC and gain access to the drive in My Computer (hopefully the flash drive will open in explorer when you insert it).
If your flash drive is registered as 'D:' in My Computer for example you would expand "Nevitium-1.5.4.zip" to "D:\". Do not let your de-compression software insert it into another folder like "D:\Nevitium-1.5.4\" this would result in "D:\Nevitium 1.5.4\Nevitium 1.5.4\" Not really what you want.
Next you would create some new folders to hold the PDF files for Invoices, Quotes and Reports. You may also need to create other folders to hold images for inventory if you have them.
WARNING:If you are loading large images (or other large amounts of data) from a flash drive it will be very slow!
This is how you would setup the files and folders on a flash drive to run Nevitium.
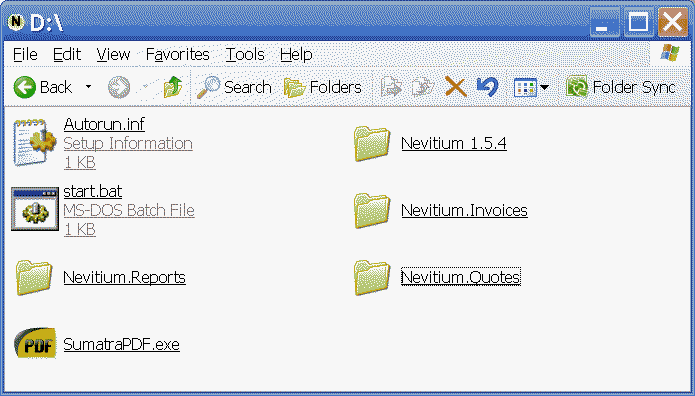
TIP:The other files pictured, "Autorun.inf" and "start.bat" are available as a zip file for download . Just expand this file to the flash drive(Ex."D:\").
When you run Nevitium you should also use the default data folder "data/". It is located inside "Nevitium 1.5.4".
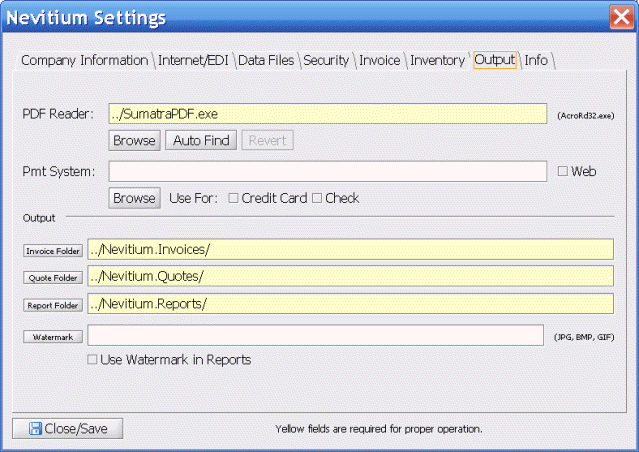
This is how you would configure Nevitium to run off the flash drive using the folders you created for Invoices, Quotes and Reports. Notice here I also have Sumatra, a free portable PDF reader.
When setup like this you can insert the USB drive into a Windows 2000 or XP PC (this feature has been removed from Windows 7) and it will ask you if you want to run Nevitium. Press OK and it starts up for you.
CAUTION:You need to make sure to "Eject" the flash drive before removing it from the PC to make sure all of your data has been recorded to the device. If your XP is updated (XP SP2) I believe the default is "Configured for Easy Removal" which prevents write-caching making sure your data is recorded live. When "Configured for Performance" write-caching is on and you must do a manual Right-Click->>Eject to ensure your data is recorded properly before removing the flash drive. Its the same for any other operation involving a flash drive as well.